Pages

Showing posts with label how to bbq pork. Show all posts

Sunday, February 03, 2013

Cold Weather Smoking

Today I am smoking two 10 lb pork shoulder picnics for the Superbowl celebration tonight.  I haven't had a major cook in a few weeks, so I've been looking forward to it for the past several days. Their is a certain challenge to cooking 20 lbs of meat within an established timeframe and to a certain standard. I want juicy, flavorful pork that is not too dry and not too greasy. I want it cooked to 199-200 degrees internal temperature so that it pulls apart easily - just the right consistency for pulled pork sliders I have in mind for Superbowl snacking.

There's only one problem....it's 12 degrees outside right now and we've had a few days of snow that's beginning to accumulate into several inches at this point.

I use an upright charcoal smoker with a charcoal maze, water pan, adjustable air intake, adjustable exhaust, and 1 inch of insulation throughout the cooker walls. The water pan rests on a removable metal grate about 4 inches above the charcoal. The water pan is completely adjustable. I can remove it completely, move it forward or backward, or place it directly above the center of the maze. This adjustability gives me more control over the fire management and temperature of the cooker and ultimately; how fast I cook the meat.

I have experience with cold weather smoking, so I thought I would share some tips that I've learned.

Cold Weather Smoking Tips

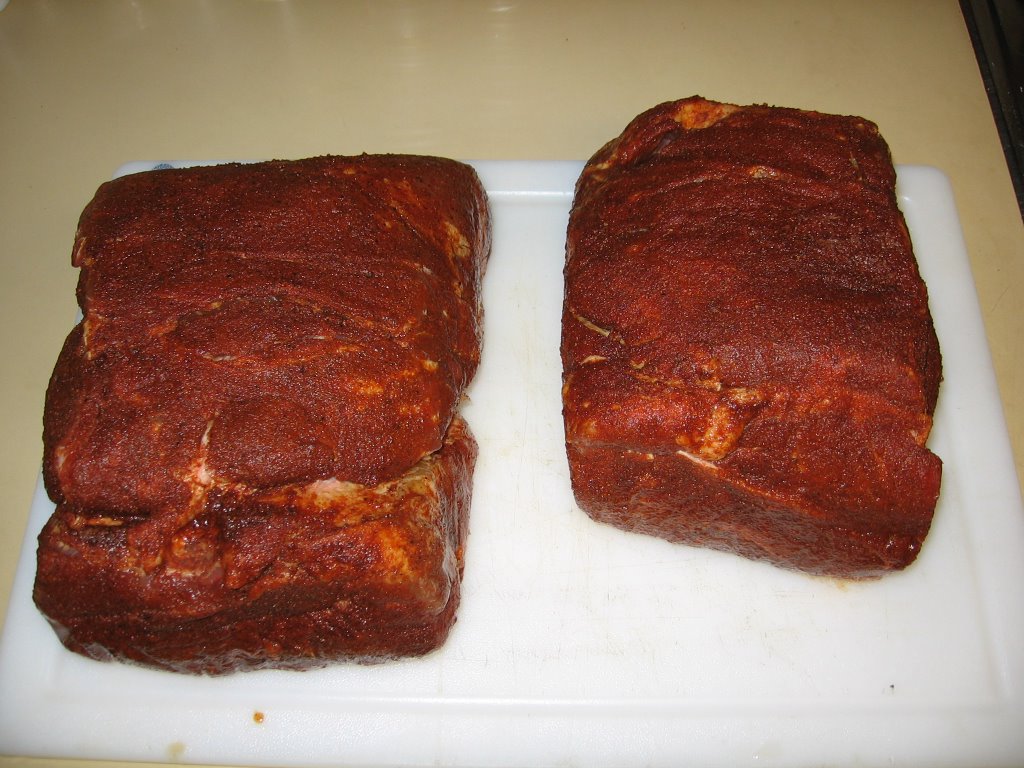
1. Prepare everything the night before - load the cooker with charcoal, get your supplies ready, move your cooker into an easily accessible pre-staging area so it's easy to get to when you're ready to start cooking. I store my cooker in the garage, so last night before going to bed I pulled it out from it's storage area and positioned it directly in front of the garage door. This morning all I had to do was roll it outside, light the fire, and it was off to the races.

2. Use an insulated charcoal smoker - In temperatures below freezing, a stickburner (i.e. offset smoker using firewood with the cooking chamber located to one side of the cooking grates) isn't going to work

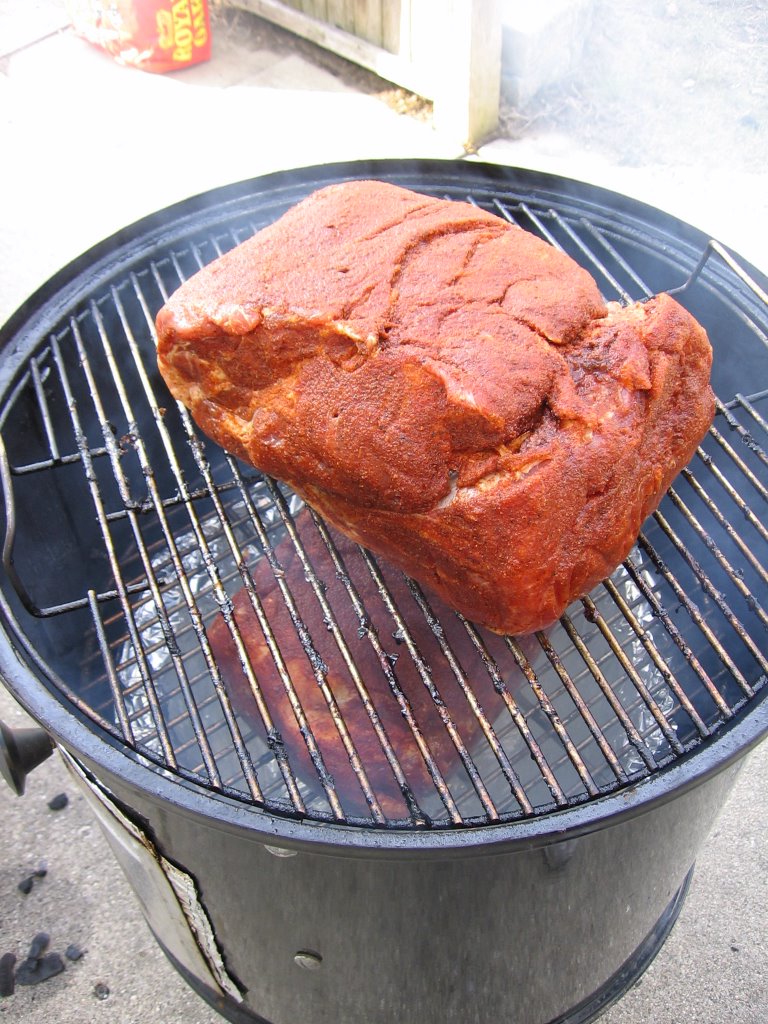
3. Get the fire hot first - In warm weather it's not crucial, but in cold weather it's a mistake to put the meat on the cooker before the cooker temperature reaches at least 200 degrees. Put the meat on too early and you will probably extend the cooking time by a couple of hours. Opening and closing the door and pittling around adjusting the fire will keep the cooker temperature lower than desired longer than desired.

4. Add water to the charcoal pan slowly - To help your cooker build temperature quickly, don't start with a lot of water in the water pan. You can always add more later. I like to start with about 1/2 a gallon in my 3 gallon water pan and then add more as needed.

5. Keep an eye on the temperature gauge - In cold weather the cooker temperature will fall very quickly if conditions are not just right.

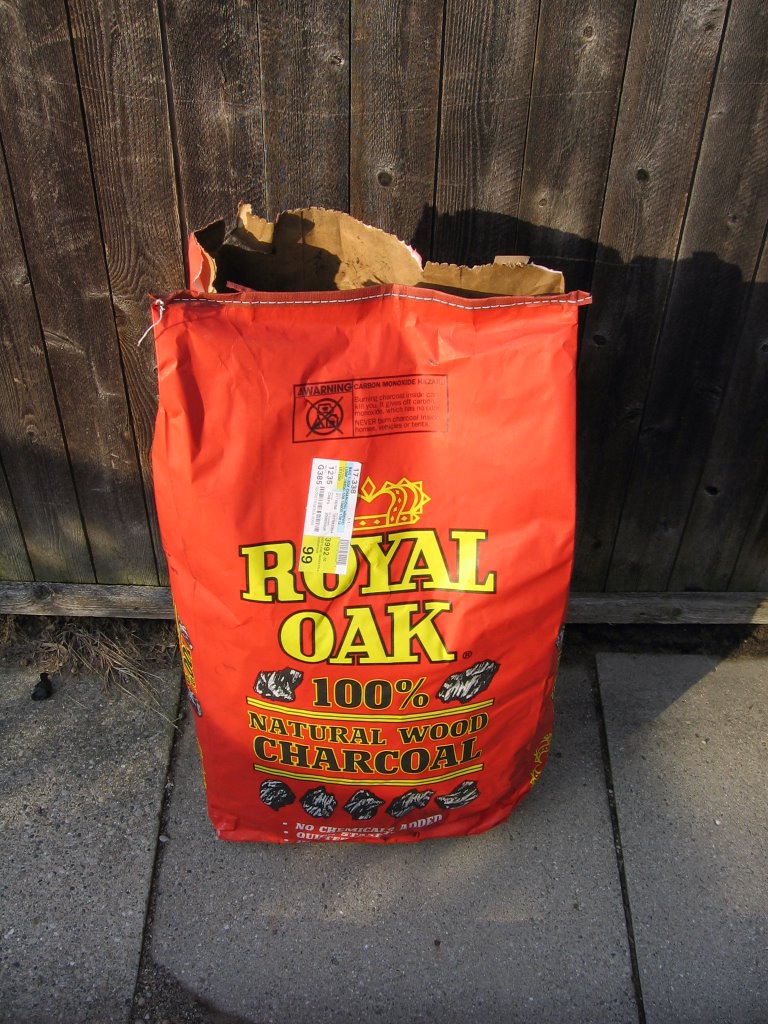
6. Keep additional supplies of charcoal close-by - In cold weather it's going to require more fuel to maintain a given temperature, so don't  be afraid to add more charcoal during a cooking session if it's needed.

Sunday, October 21, 2012

BBQ Made Simple

O.k. I'll admit it. 

This weekend I was in the mood for some complicated bbq.

I pulled out my favorite copy of Peace, Love and Barbecue last night and prepared to cook one of the numerous World Championship bbq recipes that are featured.  Unfortunately, after a quick trip to the pantry for supplies to mix up a pork rub, I soon realized that I was missing a primary ingredient - sugar. (We've been trying to eat a little healthier and I've been using stevia in my iced tea.)

Since it was almost 9 p.m., heading out to the store did not sound too appealing. Sometimes you just have to drop back and punt, so I headed back to the pantry and returned with some leftover Billy Bones spice rub that we purchased at Cabela's.

After a couple of apple juice-mixed-with-honey injections and a quick-but-liberal sprinkling of spice rub, the pork butts were marinating in the refrigerator. There was minimal mess and less fuss compared to mixing up a recipe from scratch.

Keeping with the less-is-more philosophy of the day, I pulled out the Weber Smokey Mountain water smoker this morning instead of rearranging the garage to pull out the custom built insulated upright that works pretty well with temperatures nearing refrigerator levels here in Southeast Michigan. The WSM is nearing it's 11th year birthday, but still works like new. It's a true set it and forget it cooker. Who needs a fancy smancy computer controller? And what good really comes from those my-smoker-is-bigger-and-more-expensive-than-yours models?  Truth be told, I have always gravitated toward using the $189.99 basic black cooker versus the $1,500 custom painted red version of the same basic design for informal personal cooking sessions.

I often think about putting my retirement savings on the back burner for a while and putting my name on the waiting list for a premium offset smoker that's all the rage on the competition circuit these days.

But on days like this while watching the Sunday morning talking heads, reading the newspaper, surfing my favorite bbq websites, catching up on Facebook, and writing a couple of bbq blog posts I remember why I started cooking bbq in the first place. I really enjoy good food cooked the way I like to eat it without having to spend a lot of money.

Pulled pork seasoned with Billy Bones spice rub from Cabela's
In competition I cooked pork butts to 196 degrees and let it rest in a cooler for 4 or 5 hours before turn in time.

I cooked this pork at 225 degrees for roughly 8 hours to an internal temperature of 200 degrees. I have found that when cooking the meat a little longer, it doesn't need to rest quite as long before pulling. These butts rested for 90 minutes and separated easily.


While I had the cooker fired up I decided to cook some pork ribs too. I purchased these ribs locally from Back Forty Acres in Chelsea, MI. They are untrimmed, but for eating ribs at home it's not always necessary to trim them. Trimming is time consuming and there's also a certain amount of waste that occurs.


Untrimmed pasture raised Tamworth ribs from Back Forty Acres
Update:  I took some leftover ribs for lunch and they were delicious.

Sunday, December 19, 2010

BBQ for Christmas

We travel out of state for Christmas to visit relatives every year. To make it easier on the family we visit, we like to take some bbq along. We cook it the week before, vacuum seal it, and freeze it. When it's time to eat - we thaw it the rest of the way, reheat in the microwave, and add a little Blues Hog BBQ Sauce. It always turns out well. I highly recommend this method if you need to take food along with you when you're traveling - especially if you like to eat well. After all, what's better than bbq you cooked yourself?

I seasoned the pork butts and brisket the night before. I always refrigerate the meat overnight in the refrigerator to allow the spices to penetarate the meat better. I used my own spice rub on the brisket and tried some Oakridge BBQ seasoning on the pork butts.

I don't inject anything into the brisket, but usually inject a mixture of apple juice (3 cups), honey (1/2 cup), and whatever spice rub (3 TBSPs) I'm using into the pork butts. Those amounts work well for two pork butts. You would need to adjust the quantities accordingly for less or more meat as desired.

Since the cookers were hot, I decided to cook some chicken quarters (minus the drumsticks) on the WSM.

These were seasoned with poultry rub and marinated for 3 hours in Newman's Own salad dressing.


Here's a video of the pictures from the prepping and cooking process if you'd like to see them:


Tuesday, June 09, 2009

Weber Smokey Mountain Pulled Pork

Championship BBQ.TV has a nice "how to bbq" video for preparing pork butts for smoking in the Weber Smokey Mountain.

When you place the bbq rub on the pork butt, I wouldn't waste too much time putting rub on the bottom side (fat side) of the butts. Most of the fat will render out when cooking, so there's little use in putting rub on the fat cap.

The video is a testament to the capabilities of the WSM and how it will perform in cold weather.

When I prepare pork butts I prefer to wrap the pork in aluminum foil when the butts reach an internal temperature of 160-165 degrees. This will reduce the amount of dark black coloring on the outside of the pork butts.

I hope you enjoy it.

Sunday, July 20, 2008

How to Roast a Whole Hog

If you've ever thought about roasting a pig, but weren't quite sure how to do it, Three Guy's From Miami provide step-by-step barbecue details Cuban-Christmas.com. The website has many pictures to guide you through the process and many more pictures of the final results to keep you motivated.

Besides learning to crack the spine, the hardest part of the entire process might be simply finding a pig. You want one that weighs between 60 and 100 pounds after it's dressed out. Talk to local butcher shops and grocery stores to see if they can order one for you.

The website talks about marinating the pig over night. One word of caution: if you decide to take this approach, make sure you're able to keep the pig cool during this process. If you can't maintain the pig's internal meat temperature below 40 degrees while marinating, you should skip the marinade and proceed directly to cooking.

Increase Restaurant Profits

Thursday, June 12, 2008

Cooking Pork Butts in the Weber Smokey Mountain


These pork butts were larger than the 6 lbs I prefer, but it's all Sam's had available. I injected, seasoned with spice rub and let them marinade in the refrigerator overinight.


I use lump charcoal when it's available. It's a better quality charcoal that burns cleaner, hotter and with less ash than briquettes. This bag of Royal Oak was purchased from Gordon Food Service and cost me $9.55 for 20 lbs. For comparison, 40 lbs of Kingsford briquettes costs about $11.35 at Sam's, but in this case....you get what you pay for.


I never use lighter fluid when starting charcoal. The lighter fluid can leave a bad taste on food. I prefer a charcoal chimney and a fire starter stick. You can use newspaper, but the starter sticks work better for me.


I line the water pan on the WSM with aluminum foil to make clean-up a little easier. You don't have to line the pan, but if you don't it gets pretty greasy from the pork fat melting as the pork butts cook.


I put the butts on at 10:30 a.m. and will rotate them top to bottom after about 4 1/2 - 5 hours. I also wrap them in aluminum foil at that point. It keeps the moisture in and seems to help prevent oversmoking the meat. It also speeds up the cooking process.

Saturday, June 07, 2008

Learn to make pulled pork bbq

Who says you can't cook a pork butt on a kettle grill? You definitely can. However, it takes patience to learn good fire control techniques.

1. Start with a charcoal chimney full of burning briquettes (I prefer Royal Oak).

2. Place in kettle grill, banked to one side, and put the lid on.

3. Monitor temperatures in the kettle grill using a meat thermometer through the top vent.

4. Every thirty minutes, add an additional 10-12 briquettes to maintain a consistent temperature of 250 - 275 degrees (less if you can). Try to keep the lid closed as much as possible. Add more or less charcoal to maintain temperature.

5. Place a pork butt on the grate of the grill, fat side down, on the opposite side of the burning briquettes. I like to pre-season the butt with bbq rub the night before and let it sit in the refrigerator (in a plastic container).

6. Place an alumimum pan 1/2 filled with water over the fire side of the grate, if it's needed to keep the temperatures steady in the cooking chamber.

7. Cook the pork butt for 5 hours.

8. Check the internal temperature with a meat thermometer. It should be around 160 degrees.

9. Wrap the pork butt in a double thickness of aluminum foil and place back on the cooking grate.

10. Cook until the internal meat temperature reaches 198 degrees.

11. Remove it from the kettle grill. Wrap it in a towel, place it in an aluminum pan, and let it rest for 20- 30 minutes keeping it warm.

12. "Pull" apart for bbq sandwiches.

Sunday, May 25, 2008

Smoked Pork Chops


What could be easier than simple smoked pork chops? It's difficult to think of anything else so delicious that is this easy to prepare.

For starters, sprinkle the pork chops with a rub mixture that includes 1 tblsp each of black pepper, paprika, and turbinado sugar. Add a little salt, dry mustard, and cayenne to taste. If you'd like an exact recipe for the rub, Smoke & Spice by Cheryl and Bill Jamison has one on page 84. This is one of the few times in bbq where more isn't necessarily better, unless you like your chops hot and spicy. A nice even coating of rub will work fine, but don't over do it.

1. Rub the pork chops, place in a Ziploc bag, and let rest in the refrigerator until ready for smoking. I like to allow at least 2 to 3 hours.

2. Sear the chops on both sides in a hot cast iron skillet for 30 seconds or so.

3. Cook for an hour on the smoker at 225. Pork chops are done when the internal temperature reaches 160-165 degrees.

For sides, try the Smoke & Spice recipe for Black Eyed Pea Cakes on page 265. They are excellent when served with a mustard based bbq sauce.

Monday, December 05, 2005

BBQ Pork Recipe

Ingredients:

6-7 lb pork butt
Martinelli's apple juice
barbecue spice rub
cooking spray

Cooking Instructions:

1. Inject pork butt with 5-6 oz. of apple juice.
2. Spray butt with cooking spray (it will help the spice rub adhere).
3. Sprinkle a liberal amount (i.e. gobs) of bbq rub on the outside of the butt.
4. Wrap tightly in plastic wrap and refrigerate overnight in a Ziploc bag.
5. Heat the cooker to 250 degrees with a wood or charcoal fire.
6. Place the butt on the cooker and cook until internal temp reaches 165 degrees
7. Wrap in aluminum foil. A double or triple thickness is best.
8. Continue cooking until internal temp reaches 192-193 degrees.
9. Remove from smoker and allow butt to rest for an hour or two.
10. I like to wrap the butt in towels and place it in an Igloo cooler, which will hold heat.
11. Remove butt and "pull" or "chop" into bite size pieces.
12. Serve on hamburger buns with your favorite bbq sauce.