BBQTV has several nice bbq videos posted on You Tube. There's a nice video of Rib Ranger preparing chicken and a some from the Jack Daniels cook-off among others. There's even one for the Caldera Tall Boy from the BBQ Guru folks.
Saturday, June 28, 2008


Weber Smokey Mountain Video
For anyone reading the bbq blog that hasn't had the opportunity to see a WSM in action, I found the next best thing -- a video. It's not exactly step-by-step how I use mine, but it covers the basics and will get you started cooking with your WSM.
Start a Catering Business
Start a Catering Business
BBQ Trailer

I appreciate all of you that inquired about the bbq trailer we had for sale. It went home with its' new owners today. So if you're at a bbq contest in Michigan (or Canada) and you see a Doolittle trailer that looks familar, don't be surprised. It might be ours.
Saturday, June 21, 2008
BBQ Smoker Buyer's Guide
I've put together some links to bbq smoker trailer manufacturer's below. I don't own any of these units listed and don't endorse a particular manufacturer over another one, but I thought it might be nice to list links to all these manufacturer's in one place.
Cookers and grills This manufacturer from Union Point, Georgia has designed some nice looking smoker trailers that incorporates reverse flow design.
Lang I cooked with a Lang Model 84 several times with another competition team when I was just getting started. It's a popular offset for a reasonable price and it will cook large quantities of bbq. They're now building a twin Model 108 for those that need to cook massive amounts of 'que.
Peoria Custom Cookers They make them big, small and every size in between. From backyard to professional, they've got a cooker for almost every cook. Take a look at their Meat Monster cooker. It packs a lot of nice features in a small package.
Cookers and grills This manufacturer from Union Point, Georgia has designed some nice looking smoker trailers that incorporates reverse flow design.
Lang I cooked with a Lang Model 84 several times with another competition team when I was just getting started. It's a popular offset for a reasonable price and it will cook large quantities of bbq. They're now building a twin Model 108 for those that need to cook massive amounts of 'que.
Peoria Custom Cookers They make them big, small and every size in between. From backyard to professional, they've got a cooker for almost every cook. Take a look at their Meat Monster cooker. It packs a lot of nice features in a small package.
Thursday, June 12, 2008
Cooking Pork Butts in the Weber Smokey Mountain
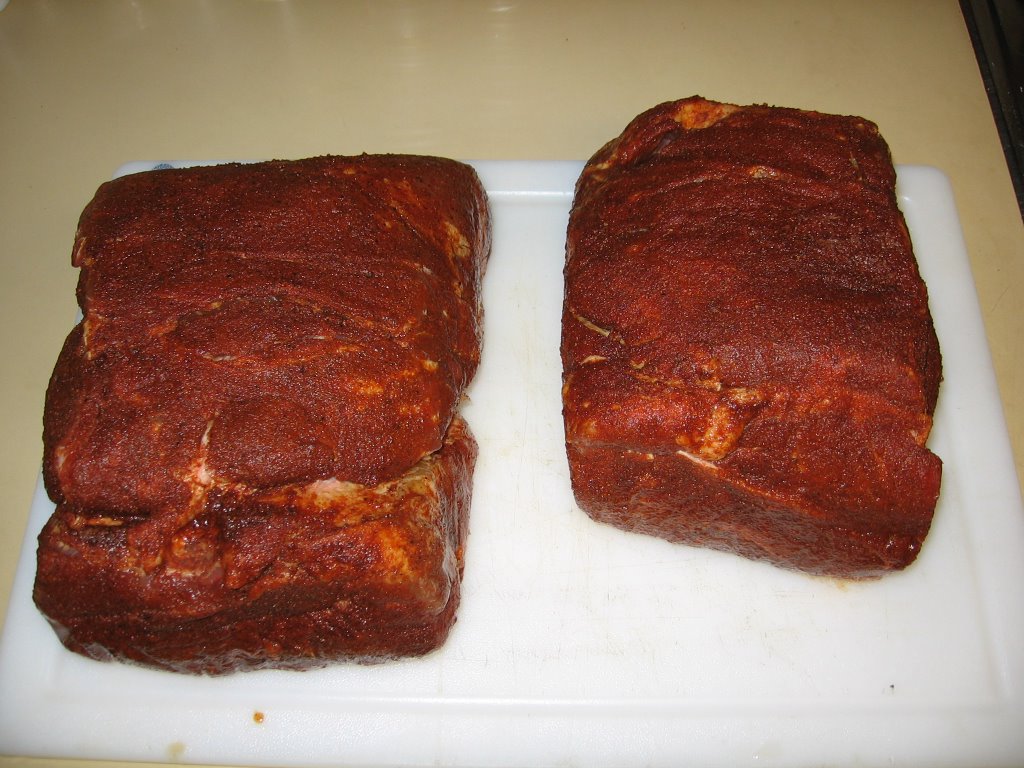
These pork butts were larger than the 6 lbs I prefer, but it's all Sam's had available. I injected, seasoned with spice rub and let them marinade in the refrigerator overinight.

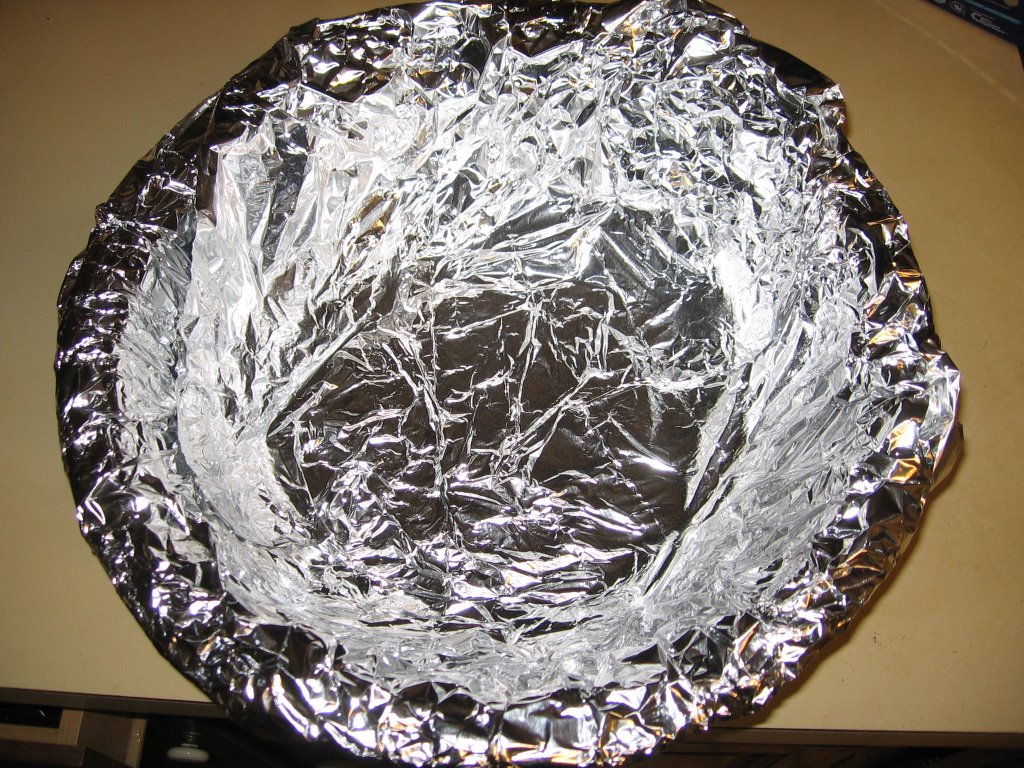 I line the water pan on the WSM with aluminum foil to make clean-up a little easier. You don't have to line the pan, but if you don't it gets pretty greasy from the pork fat melting as the pork butts cook.
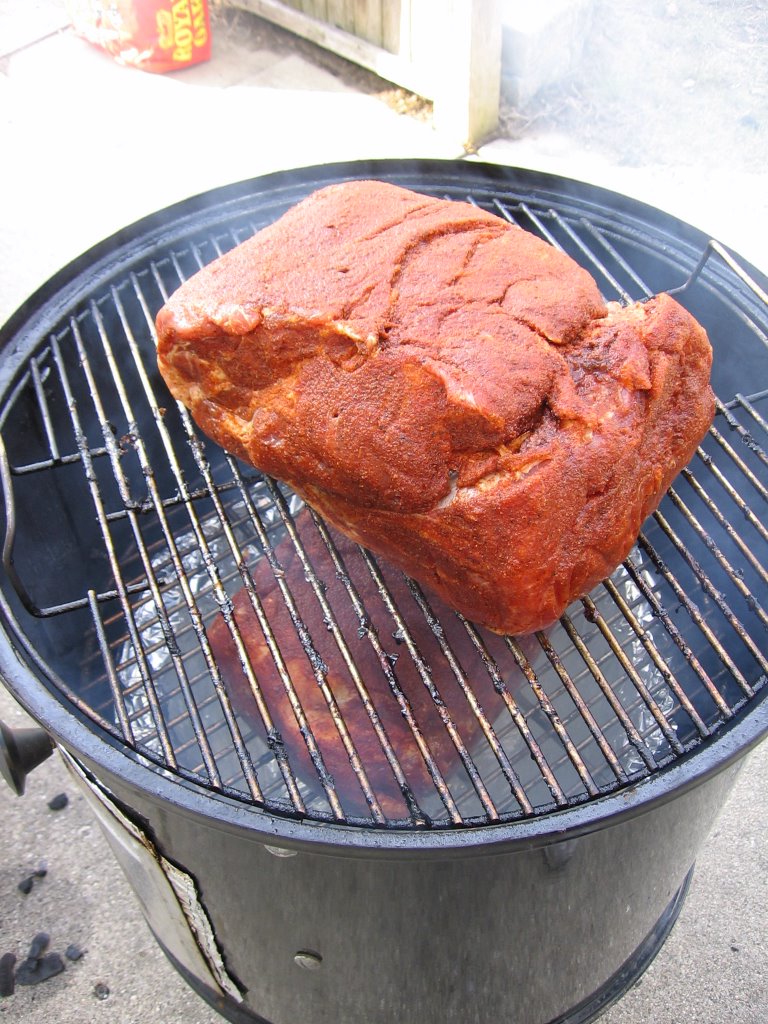 I put the butts on at 10:30 a.m. and will rotate them top to bottom after about 4 1/2 - 5 hours. I also wrap them in aluminum foil at that point. It keeps the moisture in and seems to help prevent oversmoking the meat. It also speeds up the cooking process.
Starting a BBQ Rub Business
Since I've been marketing bbq rubs online for several years, I'm sometimes asked for information about how it's done and how to get started.
Like many bbq enthusiasts that start competing extensively, I began searching for various opportunities to earn back some expenses. I'd seen several of my friends start selling bbq rubs at contests and it seemed like a good business opportunity to promote at TheBBQGuy.com .
I started with a Google search, and it just grew from there. First I found a co-packer that would sell in smaller quantities and then I learned about labeling regulations. (You generally have to buy in quantities of 15 cases or more for an initial order size.)
I started selling a 13 oz bottle and it's still the more requested size. Due to changes by my co-packer, I am now only able to offer my rub in 8 oz bottles. I've also discovered that the bigger the bottle the more profitable it is. The difference in the cost of goods is not that great, but the profit margins are considerably different. I've also learned that BBQ enthusiasts prefer to buy in bigger quantities. Hobbyists and those just starting to learn low and slow cooking seem to want to purchase the smaller bottles.
So, therein lies the predicament in starting a bbq rub business. What you want to sell isn't what most people want to buy. And as I learned in business school....that's why they call it marketing.
But perhaps most of all, I've learned that plain old word of mouth is still the most effective method for bbq rubs when you're just starting out. Friends, family, and neighbors are loyal customers who will keep coming back for more. As with any new venture it's always nice to get some regular customers when you're starting out.
Like many bbq enthusiasts that start competing extensively, I began searching for various opportunities to earn back some expenses. I'd seen several of my friends start selling bbq rubs at contests and it seemed like a good business opportunity to promote at TheBBQGuy.com .
I started with a Google search, and it just grew from there. First I found a co-packer that would sell in smaller quantities and then I learned about labeling regulations. (You generally have to buy in quantities of 15 cases or more for an initial order size.)
I started selling a 13 oz bottle and it's still the more requested size. Due to changes by my co-packer, I am now only able to offer my rub in 8 oz bottles. I've also discovered that the bigger the bottle the more profitable it is. The difference in the cost of goods is not that great, but the profit margins are considerably different. I've also learned that BBQ enthusiasts prefer to buy in bigger quantities. Hobbyists and those just starting to learn low and slow cooking seem to want to purchase the smaller bottles.
So, therein lies the predicament in starting a bbq rub business. What you want to sell isn't what most people want to buy. And as I learned in business school....that's why they call it marketing.
But perhaps most of all, I've learned that plain old word of mouth is still the most effective method for bbq rubs when you're just starting out. Friends, family, and neighbors are loyal customers who will keep coming back for more. As with any new venture it's always nice to get some regular customers when you're starting out.
Saturday, June 07, 2008
Learn to make pulled pork bbq
Who says you can't cook a pork butt on a kettle grill? You definitely can. However, it takes patience to learn good fire control techniques.
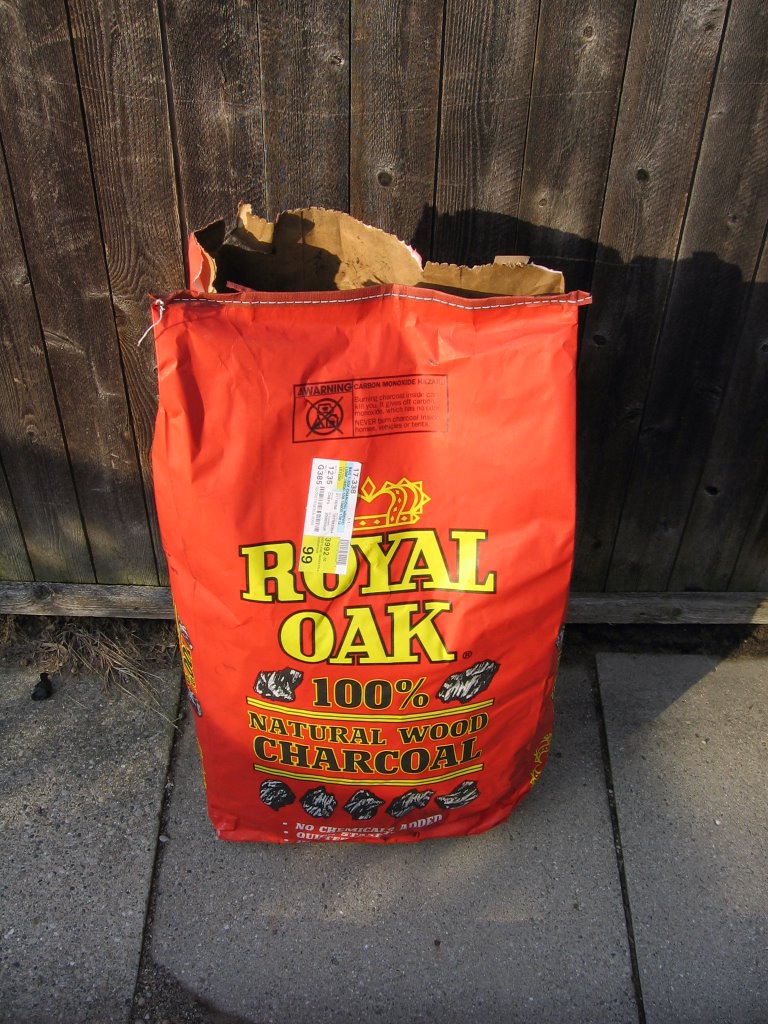
1. Start with a charcoal chimney full of burning briquettes (I prefer Royal Oak).
2. Place in kettle grill, banked to one side, and put the lid on.
3. Monitor temperatures in the kettle grill using a meat thermometer through the top vent.
4. Every thirty minutes, add an additional 10-12 briquettes to maintain a consistent temperature of 250 - 275 degrees (less if you can). Try to keep the lid closed as much as possible. Add more or less charcoal to maintain temperature.
5. Place a pork butt on the grate of the grill, fat side down, on the opposite side of the burning briquettes. I like to pre-season the butt with bbq rub the night before and let it sit in the refrigerator (in a plastic container).
6. Place an alumimum pan 1/2 filled with water over the fire side of the grate, if it's needed to keep the temperatures steady in the cooking chamber.
7. Cook the pork butt for 5 hours.
8. Check the internal temperature with a meat thermometer. It should be around 160 degrees.
9. Wrap the pork butt in a double thickness of aluminum foil and place back on the cooking grate.
10. Cook until the internal meat temperature reaches 198 degrees.
11. Remove it from the kettle grill. Wrap it in a towel, place it in an aluminum pan, and let it rest for 20- 30 minutes keeping it warm.
12. "Pull" apart for bbq sandwiches.
Thursday, June 05, 2008
KCBS Power Rankings
ThePickledPig.com is now publishing bbq team rankings for the top twenty-five overall in each of the four KCBS meat categories and the top twenty-five overall combined.
The site has developed a widget also that you can display on your personal website to display how your own team stacks up against the "big boys". For example, if your combined finishes calculate to 35th out of 450 ranked teams, the widget will display the rankings on your page. The widget changes the rankings based on the KCBS contest results, and it changes throughout the season. Pretty cool!
NationalBBQRankings.com publishes a similar list using a 104 week rolling time period. This method displays who has performed consistently over a longer period and in a potentially larger number of bbq contests. These rankings include a variety of sanctioning bodies.
The site has developed a widget also that you can display on your personal website to display how your own team stacks up against the "big boys". For example, if your combined finishes calculate to 35th out of 450 ranked teams, the widget will display the rankings on your page. The widget changes the rankings based on the KCBS contest results, and it changes throughout the season. Pretty cool!
NationalBBQRankings.com publishes a similar list using a 104 week rolling time period. This method displays who has performed consistently over a longer period and in a potentially larger number of bbq contests. These rankings include a variety of sanctioning bodies.
Sunday, June 01, 2008
Geer Pits: A work of barbecue smoker art
The Pellet Envy Blog is reporting that Jamie Geer, the world's foremost bbq pit builder is going to start building barbecue smokers again. I've seen the Geer pits used by Smokin' Triggers and Lotta Bull up close and the attention to detail is awesome. There are very few pits available in the marketplace today that can match the quality of these smokers. There's also a very long waiting list to purchase one of these pits -- in case you're wondering. And, I think there's a waiting list just to get on the waiting list.
Here's a link to some more pictures of pits Jamie Geer has put together.
Here's a link to some more pictures of pits Jamie Geer has put together.
Friday, May 30, 2008
BBQ Side Item: Black Eyed Pea Cakes
Smoke & Spice has a nice recipe for Black Eyed Pea Cakes on page 265. My compliments to Cheryl and Bill Jamison for sharing this recipe. It's a great side item that goes well with all types of barbecue meats.
Cakes:
2 cups black eyed peas
1/2 cup saltine cracker crumbs
2 T minced red bell pepper
2 T minced onion
1 T minced fresh parsley
1 egg yolk
2 Tsp picked jalapeno, mayonaise, yellow mustard
1 garlic clove
1/2 cup saltine cracker crumbs
1 T butter
1 T vegetable oil
Following the recipe, puree 1 cup of black eyed peas and add 1 cup of black eyed peas in cake mixture and refrigerate for one hour. Remove and coat in cracker mixture. Fry in butter and oil mixture in skillet before smoking for 30 minutes.
They are excellent when served with a mustard based bbq sauce.
If you like Smoke & Spice, be sure to visit CookingwiththeJamisons.com to learn about their other cookbooks.
Black Eyed Pea Cakes
Cakes:
2 cups black eyed peas
1/2 cup saltine cracker crumbs
2 T minced red bell pepper
2 T minced onion
1 T minced fresh parsley
1 egg yolk
2 Tsp picked jalapeno, mayonaise, yellow mustard
1 garlic clove
1/2 cup saltine cracker crumbs
1 T butter
1 T vegetable oil
Following the recipe, puree 1 cup of black eyed peas and add 1 cup of black eyed peas in cake mixture and refrigerate for one hour. Remove and coat in cracker mixture. Fry in butter and oil mixture in skillet before smoking for 30 minutes.
They are excellent when served with a mustard based bbq sauce.
If you like Smoke & Spice, be sure to visit CookingwiththeJamisons.com to learn about their other cookbooks.
Wednesday, May 28, 2008
Pickin' in the Panhandle BBQ Contest
I received a flyer in the mail today announcing the Pickin' in the Panhandle bbq contest, the West Virginia State BBQ Championship sanctioned by the KCBS.
The contest is being held on September 5th and 6th in Back Creek Valley, West Virginia. With $10,000 in prize money on the line, the $200 entry fee provides a chance to earn $2,000 in first place prize money. A win in one of the four primary meat categories (chicken, ribs, pork, brisket) offers a chance to win $500. Win all four categories and grand champion....and you take home $4,000. It's a long shot, but it's been done before!
Registration ends on August 31, 2008. Phone (304) 264-8801 for more information.
The contest is being held on September 5th and 6th in Back Creek Valley, West Virginia. With $10,000 in prize money on the line, the $200 entry fee provides a chance to earn $2,000 in first place prize money. A win in one of the four primary meat categories (chicken, ribs, pork, brisket) offers a chance to win $500. Win all four categories and grand champion....and you take home $4,000. It's a long shot, but it's been done before!
Registration ends on August 31, 2008. Phone (304) 264-8801 for more information.
Sunday, May 25, 2008
BBQ Vacation?
When planning a summer vacation destination last summer, I lobbied hard for a trip to Texas for a bbq road trip, but I was out voted. We toured South Dakota, Wyoming, and Colorado instead.
I enjoyed our trip to the Badlands, Mount Rushmore, and the Rodeo Museum in Cheyenne, WY and everything else along the way, but still want to visit Texas soon.
I ran across a video today that provides a itinerary for anyone else planning a Texas bbq vacation.
I enjoyed our trip to the Badlands, Mount Rushmore, and the Rodeo Museum in Cheyenne, WY and everything else along the way, but still want to visit Texas soon.
I ran across a video today that provides a itinerary for anyone else planning a Texas bbq vacation.
Slow Cooked BBQ Hamburgers
In my house, the celebration of Memorial Day weekend always includes an afternoon watching the Indianapolis 500 at the Brickyad and an evening watching the Charlotte 600 from Lowe's Motor Speedway. Between the races I cook a little bbq. This year I'm preparing some hamburgers for smoking.
Here's my recipe:
Sprinkle the rub on both sides of the patties and refrigerate until ready for cooking.
Pre-heat a bbq smoker to 250 degrees. Slow cook the hamburgers until desired level of doneness.
For a step by step recipe, refer to Humdinger Hamburgers in the Smoke & Spice bbq book by Cheryl and Bill Jamison.
Here's my recipe:
- Start with 2 lbs. of hamburger.
- Dice half an onion.
- Dice a roasted jalenpeno pepper.
- Mix together and form five or six hamburger patties.
Sprinkle the rub on both sides of the patties and refrigerate until ready for cooking.
Pre-heat a bbq smoker to 250 degrees. Slow cook the hamburgers until desired level of doneness.
For a step by step recipe, refer to Humdinger Hamburgers in the Smoke & Spice bbq book by Cheryl and Bill Jamison.
BBQ Food Costs Calculation
If you run a bbq restaurant, catering business, or any other type of food enterprise, at some time or another you will probably need to calculate your costs.
Several years ago I managed a popular breakfast restaurant (part of a very large company). The management company calculated food costs for each restaurant in the chain and the overall food cost for the entire company on a regular basis.
To calculate your own food cost percentage, add Beginning Inventory and Purchases. Subtract Ending Food Inventory. Then divide that figure by Food Sales.
For the typical breakfast restaurant, food costs range from 24% to 26%. Food costs for a steak, hamburger, or bbq restaurant will likely be higher because meat costs more than waffles and eggs.
Several years ago I managed a popular breakfast restaurant (part of a very large company). The management company calculated food costs for each restaurant in the chain and the overall food cost for the entire company on a regular basis.
To calculate your own food cost percentage, add Beginning Inventory and Purchases. Subtract Ending Food Inventory. Then divide that figure by Food Sales.
For the typical breakfast restaurant, food costs range from 24% to 26%. Food costs for a steak, hamburger, or bbq restaurant will likely be higher because meat costs more than waffles and eggs.
Smoked Pork Chops

What could be easier than simple smoked pork chops? It's difficult to think of anything else so delicious that is this easy to prepare.
For starters, sprinkle the pork chops with a rub mixture that includes 1 tblsp each of black pepper, paprika, and turbinado sugar. Add a little salt, dry mustard, and cayenne to taste. If you'd like an exact recipe for the rub, Smoke & Spice by Cheryl and Bill Jamison has one on page 84. This is one of the few times in bbq where more isn't necessarily better, unless you like your chops hot and spicy. A nice even coating of rub will work fine, but don't over do it.
1. Rub the pork chops, place in a Ziploc bag, and let rest in the refrigerator until ready for smoking. I like to allow at least 2 to 3 hours.
2. Sear the chops on both sides in a hot cast iron skillet for 30 seconds or so.
3. Cook for an hour on the smoker at 225. Pork chops are done when the internal temperature reaches 160-165 degrees.
For sides, try the Smoke & Spice recipe for Black Eyed Pea Cakes on page 265. They are excellent when served with a mustard based bbq sauce.
Cooking Ribs on a Kettle Grill
You don't have to buy an expensive bbq smoker to begin cooking your own mouth watering ribs in the backyard (or in the front driveway in my case). Traditional style charcoal grills like those manufactured by Weber, Charbroil, and numerous others, are perfectly capable of producing excellent barbecue.
To get started, go to Sam's Club, or your favorite other source, and purchase a three-pack of baby back or loin back pork ribs.
Rub both sides of the ribs with your favorite bbq rub mixture. Pat the rub into place to make it adhere to the meat. The meat should be completely covered with rub. Wrap each rib in several layers of plastic wrap and place in refrigerator for 10 to 12 hours until ready for cooking. Overnight works well.
Start warming up the kettle grill, when ready to cook, by placing a large fist-sized amount of charcoal coals on one side of the grill and heat them until they turn grey.
Check the temperature of the cooking surface with a meat thermometer poked through the air vents until you achieve a stable temperature between 200 and 250 degress.
Fill an alumimum pie pan with water and place it in the bottom of the kettle grill, or partially over the coals. Refill as needed.
Cook the ribs on the opposite side of the grill away from the charcoal coals. Using a rib rack, you can fit all three racks of ribs on the grill at one time.
Once the cooking process starts, just monitor the temperature and water levels. Add charcoal to maintain 200 to 250 degrees and maintain water levels in the alumimum pan.
To check for doneness, gently tug at the bones of the ribs. If done, the bone and meat should separate with minimum effort. Using this method, cook times should vary between 4 to 5 hours depending on the heat of the fire and outside temperature.
Brush some bbq sauce on the ribs prior to serving.
To get started, go to Sam's Club, or your favorite other source, and purchase a three-pack of baby back or loin back pork ribs.
Rub both sides of the ribs with your favorite bbq rub mixture. Pat the rub into place to make it adhere to the meat. The meat should be completely covered with rub. Wrap each rib in several layers of plastic wrap and place in refrigerator for 10 to 12 hours until ready for cooking. Overnight works well.
Start warming up the kettle grill, when ready to cook, by placing a large fist-sized amount of charcoal coals on one side of the grill and heat them until they turn grey.
Check the temperature of the cooking surface with a meat thermometer poked through the air vents until you achieve a stable temperature between 200 and 250 degress.
Fill an alumimum pie pan with water and place it in the bottom of the kettle grill, or partially over the coals. Refill as needed.
Cook the ribs on the opposite side of the grill away from the charcoal coals. Using a rib rack, you can fit all three racks of ribs on the grill at one time.
Once the cooking process starts, just monitor the temperature and water levels. Add charcoal to maintain 200 to 250 degrees and maintain water levels in the alumimum pan.
To check for doneness, gently tug at the bones of the ribs. If done, the bone and meat should separate with minimum effort. Using this method, cook times should vary between 4 to 5 hours depending on the heat of the fire and outside temperature.
Brush some bbq sauce on the ribs prior to serving.
Friday, May 23, 2008
How to BBQ Chicken

If you want to barbecue chicken there are three basic methods you can use.
1) direct grilling
2) low and slow smoking
3) combination of direct grilling and slow smoking
The choice depends largely upon personal choice and type of equipment you have available to use. If the only barbecue equipment you own is a gas grill, then you are limited to direct grilling. If you own a kettle grill then your choices are wide open. If the only equipment you own is a low and slow smoker, direct grilling is probably not going to work for you.
Direct grilling:
The fastest way to cook your chicken in an outdoor setting isn't always the best choice for moist and tender bbq chicken. When cooking chicken at temperatures above 400 degrees you risk chicken that is crisp or slightly burned on the outside skin, but undercooked on the inside. Or as is often the case, chicken that is raw in the middle. The high temperatures associated with grilling will result in "drying out". However, if you like crispy chicken skin this is probably the best choice.
The fastest way to cook your chicken in an outdoor setting isn't always the best choice for moist and tender bbq chicken. When cooking chicken at temperatures above 400 degrees you risk chicken that is crisp or slightly burned on the outside skin, but undercooked on the inside. Or as is often the case, chicken that is raw in the middle. The high temperatures associated with grilling will result in "drying out". However, if you like crispy chicken skin this is probably the best choice.
Low and slow smoking:
The slowest way to cook chicken outdoors is the best way to ensure your chicken is tender and juicy. You can use a bbq rub on the skin without burning it and you can ensure the chicken is cooked throughout without the risk of overcooking. This method often results in chicken skin that is a "rubbery" texture. If you don't like the skin, simply remove it before biting into the juicy and tender chicken.
The slowest way to cook chicken outdoors is the best way to ensure your chicken is tender and juicy. You can use a bbq rub on the skin without burning it and you can ensure the chicken is cooked throughout without the risk of overcooking. This method often results in chicken skin that is a "rubbery" texture. If you don't like the skin, simply remove it before biting into the juicy and tender chicken.
Combination direct grill and slow smoking:
Lately I've been favoring a combination of the two methods. I cook my chicken over direct charcoal heat for 4 - 5 minutes turning it often to prevent burning. This helps render the fat on the underside of the skin and helps prevent the "rubbery" effect. I then finish it off on my smoker for about an hour at 225 degrees. This combination offers the best of both crisp skin and tender and juicy meat.
Secret tip #1:
Whichever method you chose, make sure you put bbq rub under the skin prior to cooking. This will help add flavor throughout the piece of chicken.
Super secret tip #2:
After placing the spice rub under the skin let the chicken marinate in the refrigerator for a couple hours prior to cooking. The rub will penetrate deeper into the chicken. If your spice rub has a lot of salt in it, marinating longer than 2 - 2 1/2 hours might create an undesireable "salty" flavor. If your rub is hot with a lot of pepper, marinating longer than 2 - 2 1/2 hours might create "spicy" flavor.
Weber Smokey Mountain on Sale

Amazon.com is currently advertising Weber Smokey Mountain smokers for sale at $179.00. If you're in the market for a WSM, this is a good price.
For the money, the WSM is hard to beat. You can smoke ribs, chicken, pork butts, pork loins, briskets, and even a turkey.
The smoker has two racks, a charcoal grate, and a water pan. There are websites devoted entirely to the WSM and it's use.
If you are new to bbq or relearning the craft, the WSM is an inexpensive way to get your feet wet.
Friday, May 16, 2008
BBQ Rib Eye on WSM


I'm late in posting these pictures of the of the Drunk and Dirty Rib Eye (see original post below). These 1 lb. rib eye filets sprinkled with black pepper, white pepper, and marinaded for three hours. I cooked them at 225 degrees for an hour and a half and were removed from the WSM at 150 degrees internal. They were medium rare and could have used another fifteen for my tastes, but die hard steak eaters swear by medium rare steaks. (I'm just not one of them.) I solved that problem with 30 seconds in the microwave.
I highly recommend this Smoke & Spice recipe the next time you're craving a big ole' juicy tender slab of beef.
Monday, May 12, 2008
Pictures of Caldera Tall Boy
Here's a picture of my neighbor's Caldera Tall Boy.
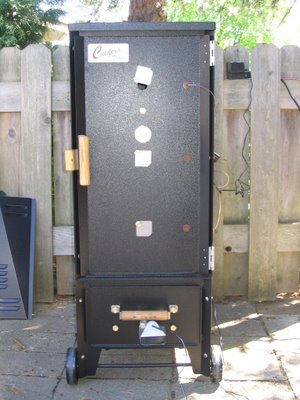
It's a nice, well thought-out design with a real "finished" look. The powder coat is real slick and the metal was cut with precision tools made to exacting standards similar to what you'd expect to see in the automotive or aircraft industry.
I know I'm going out on a limb here since I don't own a Caldera or a pellet cooker, but I believe the construction is as good or better than the pellet cookers I've seen.
Based on Linda's reaction to it when she saw it, I think there might be one of these in my future. She likes the knockdown design and lightweight aspects of the construction. I think I'd favor the original Caldera version due to the increased cooking capacity, but for back yard cooking and light competition duty, this one fits the bill.
I'd be proud to add it to my cooker collection.
BBQ Secrets Revealed, Click Here!
It's a nice, well thought-out design with a real "finished" look. The powder coat is real slick and the metal was cut with precision tools made to exacting standards similar to what you'd expect to see in the automotive or aircraft industry.
I know I'm going out on a limb here since I don't own a Caldera or a pellet cooker, but I believe the construction is as good or better than the pellet cookers I've seen.
Based on Linda's reaction to it when she saw it, I think there might be one of these in my future. She likes the knockdown design and lightweight aspects of the construction. I think I'd favor the original Caldera version due to the increased cooking capacity, but for back yard cooking and light competition duty, this one fits the bill.
I'd be proud to add it to my cooker collection.
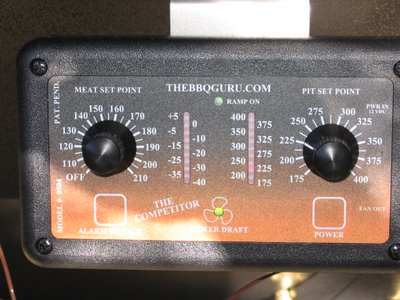
Here's a picture of the electronic control mechanism that makes the Caldera function in true "hands-off" mode. Just set it and forget it. This unit is called "The Competitor Power Draft". As I understand it "The Competitor" is the middle-of-the-road model sold by BBQ Guru.
BBQ Secrets Revealed, Click Here!
Subscribe to:
Posts (Atom)